If your blow-dry looks bouncy for 10 minutes and then collapses into flat, limp hair, the problem usually isn’t your hair—it’s your technique. The good news: a few small changes can transform your at-home blowout from deflated to full and lifted, without crunch or frizz. Below, we break down the three most common blow-dry mistakes that sabotage volume and how to fix each one, plus the right tools and products to get that polished, salon finish that actually lasts.
Mistake #1: Starting Too Wet and Skipping Proper Prep
Blow-drying from sopping-wet hair is a guaranteed volume killer. When hair is overly wet, the cuticle stays swollen and the brush slips, so you create heat without shape. Volume comes from setting hair as it cools—not from blasting it longer.
The fix: Rough-dry hair until it’s 70–80% dry before you ever pick up a round brush. Flip your head upside down and focus airflow at the roots for lift while moving the dryer constantly to avoid heat damage. Then apply the right products in the right places:
- At the roots: A lightweight volumizing spray or mousse for lift without stiffness. Look for “root lift” or “volumizing” formulas designed for fine hair.
- Mid-lengths to ends: A featherweight heat protectant that smooths and speeds dry time without flattening. Avoid heavy oils or rich creams pre-blowout; they compress the hair shaft and erase body.
A luxe option we love: Oribe Royal Blowout Heat Styling Spray—it’s whisper-light, offers serious heat protection, speeds up your blow-dry, and adds polish without weight.
Mistake #2: Using the Wrong Tools (or No Nozzle)
Your brush and dryer determine the shape and longevity of your blowout. Too large a brush and you’ll smooth without lift; too small and you’ll over-curl and frizz. And skipping the concentrator nozzle scatters airflow, roughing up the cuticle and flattening your finish.
The fix: Choose tools that work for fine or easily flattened hair:
- Round brush size: For fine to medium hair, a 1.25″–1.75″ ceramic round brush is the sweet spot for root lift and smooth bend. A ceramic barrel evenly distributes heat to set volume without hot spots.
- Bristles: Mixed or smooth bristles help grip without snagging. Avoid overly stiff bristles that create tension lines.
- Dryer power + nozzle: Use a high-velocity dryer with a concentrator nozzle to direct airflow from roots to ends. The nozzle is non-negotiable for shine and control.
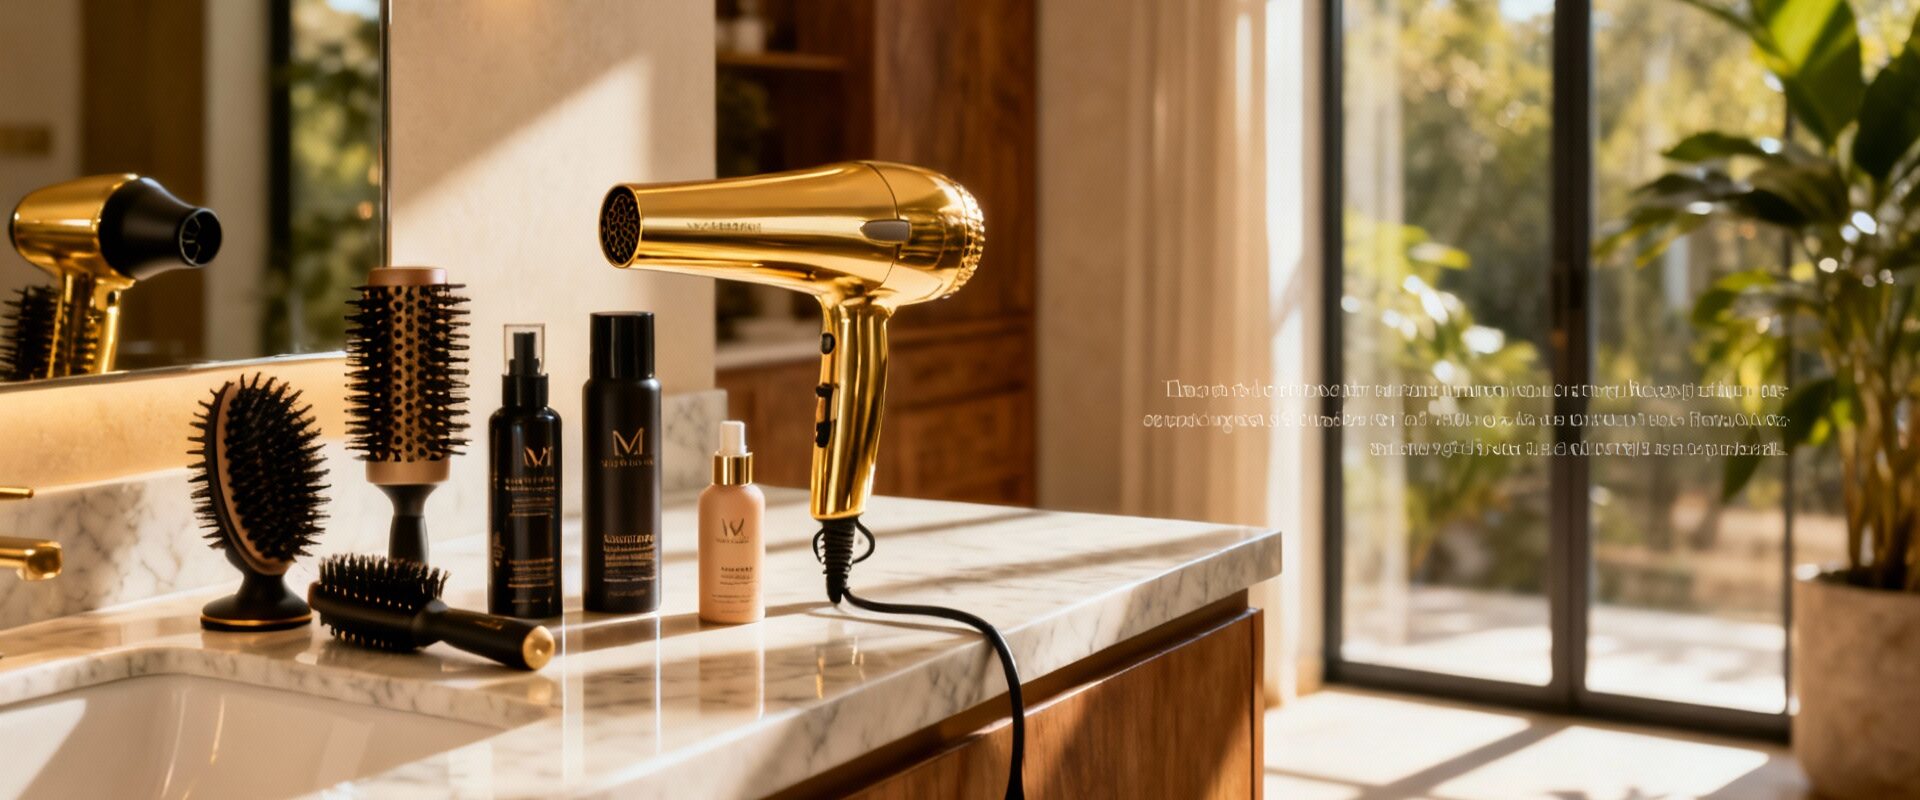
Two standouts: the Dyson Supersonic Hair Dryer for fast, controlled airflow with intelligent heat, and the ghd Ceramic Radial Brush Size 2 (35mm) for precise tension and even heat—perfect for building lift at the root while keeping ends sleek.
Mistake #3: Airflow Direction and Skipping the Set
Where the air goes matters. Aim it down the hair shaft and you’ll smooth and lift. Aim it across or up, and you rough up the cuticle or collapse your root. Another common fail: not setting your sections with cool air, which means your hard-won shape falls out as the hair cools on its own.
The fix:
- Section strategically: Divide hair into a mohawk section on top, then sides and back. Work in 1–2″ sections for control.
- Airflow direction: With the concentrator nozzle on, aim airflow from root to ends, following your brush. For the crown, overdirect sections forward as you dry to build extra lift when they fall back.
- Create tension: Tension + heat shapes the hair; heat alone doesn’t. Keep the section taut over the brush as you slowly guide the dryer down the strand.
- Cool shot to set: After each section is smooth and dry, hit it with a cool shot for 5–10 seconds before releasing the brush. No cool shot = no lasting shape.
- Optional roller set: For maximum volume, roll warm sections on large Velcro rollers at the crown and let them cool completely while you do makeup.
Pro Step-by-Step: A Voluminous Blowout for Fine or Flat Hair
- 1. Cleanse smart: Start with a lightweight, volumizing shampoo and a minimal amount of conditioner, keeping conditioner from mid-lengths to ends only.
- 2. Pre-dry: Towel blot (don’t rub), apply root lift at the scalp and a lightweight heat protectant on mids to ends. Rough-dry to 70–80% with head flipped upside down.
- 3. Section: Clip hair into a top mohawk, then sides and back. Always start at the crown or top front for the longest-lasting lift where you need it most.
- 4. Round brush: Working in small sections, place the brush beneath the roots, lift upward, and direct airflow down the strand. Rotate the brush to create a smooth bend—think polish, not tight curls.
- 5. Set: Use the cool shot on each finished section or set crown sections on large rollers until cool.
- 6. Finish light: A mist of dry texturizing spray at the roots or a touchable hairspray through the mid-lengths will hold body without stiffness. Skip heavy oils or silicones at the root area.
Smart Product Pairings That Don’t Crush Volume
The right formulas make the technique easier—and longer lasting. Here are luxe, fine-hair-friendly picks that keep lift while protecting your hair:
- Dyson Supersonic Hair Dryer: High-velocity airflow and intelligent heat control help you dry faster with less damage, which means better shape memory and less frizz.
- ghd Ceramic Radial Brush Size 2 (35mm): The ceramic barrel distributes heat evenly for smoothness and a clean bend; the mid-size is ideal for root lift on fine to medium hair.
- Oribe Royal Blowout Heat Styling Spray: Ultra-light heat protectant that speeds dry time and adds high-gloss finish without deflating roots.
Troubleshooting: Why Your Volume Still Falls
- Hair feels coated or greasy: Too much product or formulas that are too rich. Use a clarifying shampoo weekly and switch to weightless sprays or foams.
- Ends look fuzzy: Increase tension and slow your pass with the brush; finish each section with a cool shot. A tiny drop of lightweight serum on ends only can help—keep it away from the scalp.
- Lift disappears by lunch: Add the roller set step at the crown and use a flexible-hold hairspray. Avoid touching and brushing out the style repeatedly.
The Takeaway
Big, lasting volume isn’t about more heat—it’s about smarter prep, the right tools, and setting the shape. Rough-dry first, choose a ceramic round brush that matches your hair type, always use the concentrator nozzle, and lock each section with a cool shot. Invest in a quality dryer and weightless heat protectant, and your at-home blowout will rival the salon—minus the flattening by 2 p.m. Save this routine, shop the tools that work, and enjoy that lifted, glossy finish every day.
This post contains affiliate links. We may earn a commission when you shop through our links.